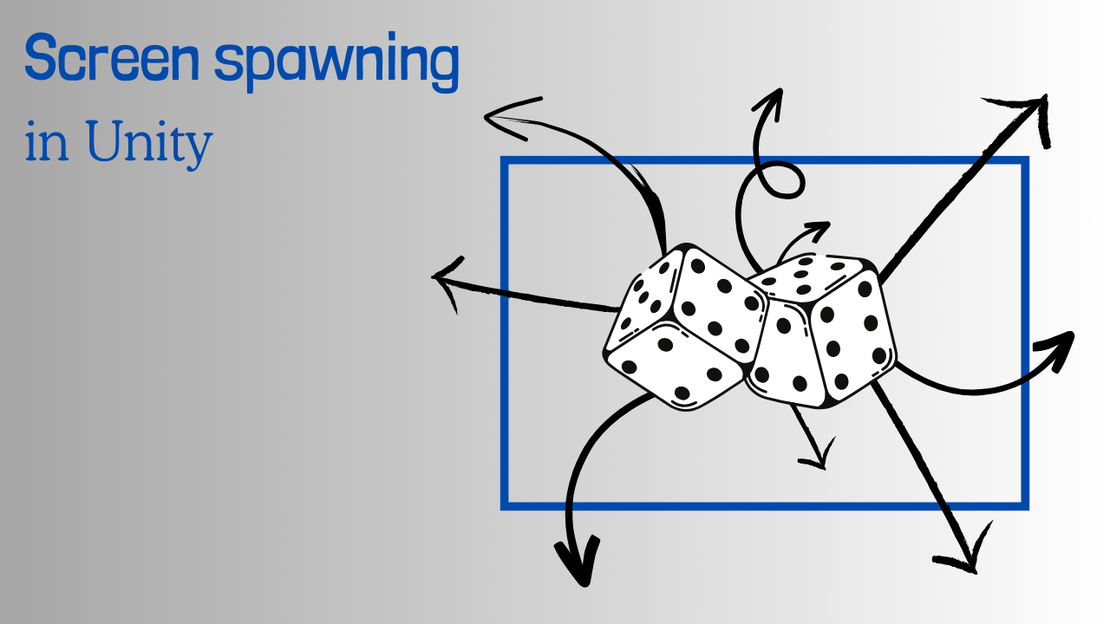
Advent calendar template
- November 19, 2023
- Tutorial , Template
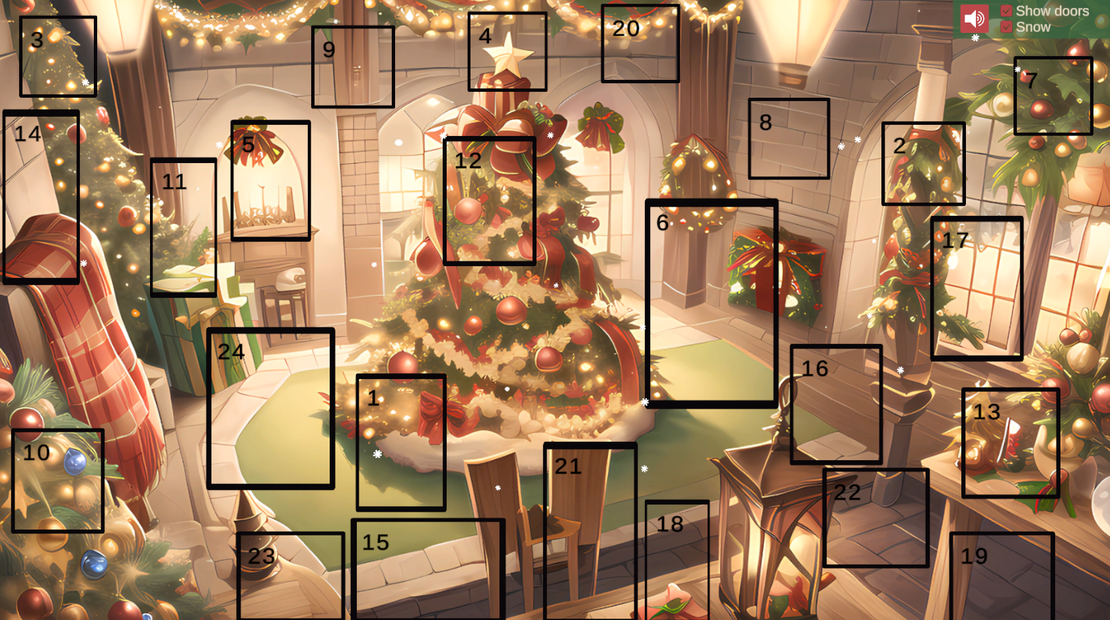
Advent calendar preview
Introduction
Hello fellow game developers! This blog post will explain how to use an advent calendar template I created in unity. You can change the complete look of the calendar and create custom content for each day. All the assets I used are free (with attribution) and can be used by you. The resource code is available on github
or as a Unity package in the code section
.
This time I will not explain any code because I want to focus on the use of the advent calendar. Of course you can modify the code, but be aware that I built the advent calendar on top of a shop system. Therefore the code might be a bit over-engineered and sometimes a bit confusing. If you want to know more about the shop system I am building this project on, let me know so I can create a template and blog post for it.
Template
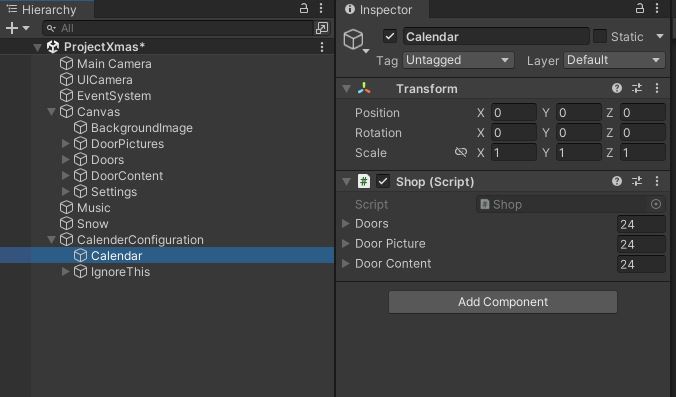
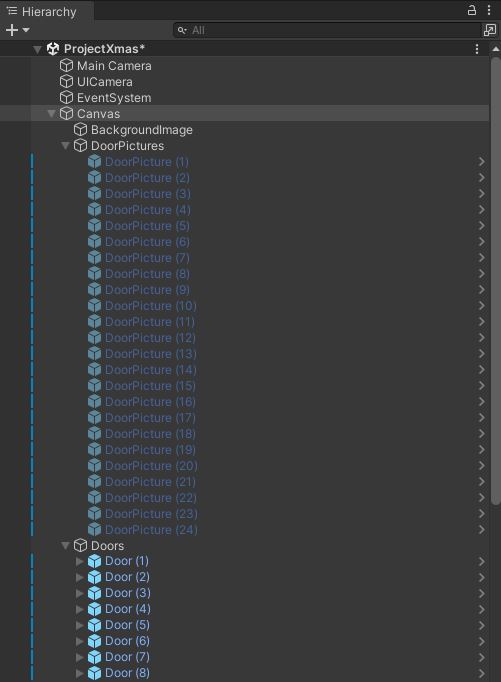
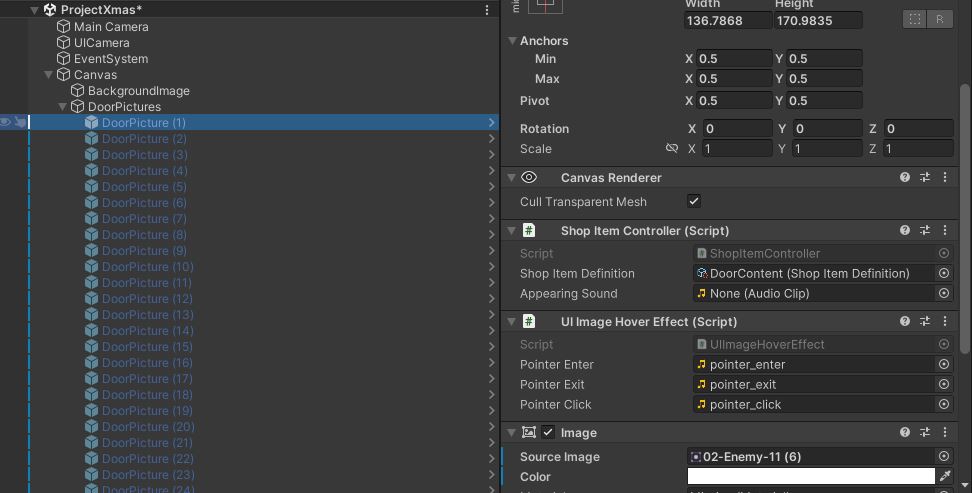
The image shows the advent calendar and the hierarchy of game objects:

The basic functionality works as follows. When the date corresponds to the door number and you click on it, an image appears inside the door. This is the door picture. It will only appear once. The next time you play, it will already be there because you opened it. When you click on that door image, it opens up an user interface. You can basically put anything in there (text, images, videos, minigames etc.). In the example, I provide an user interface with some text and a link to an external website. The idea behind this is that you can upload some assets to your desired website and protect it with a password. The user will then get access to it when opening the door content.
If you want to change the look of your advent calendar, you should navigate to the Canvas. There you can change the background image, the images that appear inside each door (DoorPictures) or the door content itself. There is also a settings section that represents the user interface in the right corner. In the Music UI element, you will find a music track attached to the Music script, which you are free to change. There is also a snow particle effect that you can modify.
If you want to change things, I suggest to start with a new background image. After that you can rearrange the UI elements for the doors and the door picture themselves. Then create content for each door. In the doorContent section you will find 24 UI elements that are sequentially associated with each door. Of course, you can also leave everything as it is and just add content to the doors.
The doors, related pictures and UI content are connected inside the shop script that is attached to the calendar (left screenshot). They are attached sequentially, so you can identify the corresponding objects by their number (right screenshot). Make sure that all objects are not empty and attached to the shop script. Normally you do not need to change anything here and can just leave it as it is.
Additional configurations can be made for each individual DoorPicture. As you can see in the image below, there are two scripts attached. In both scripts you can set some sound effects. The Appearing sound effect is played only when the door is clicked for the first time. The sounds in the UIImageHoverEffect script will be played every time the player hovers or clicks on the image.
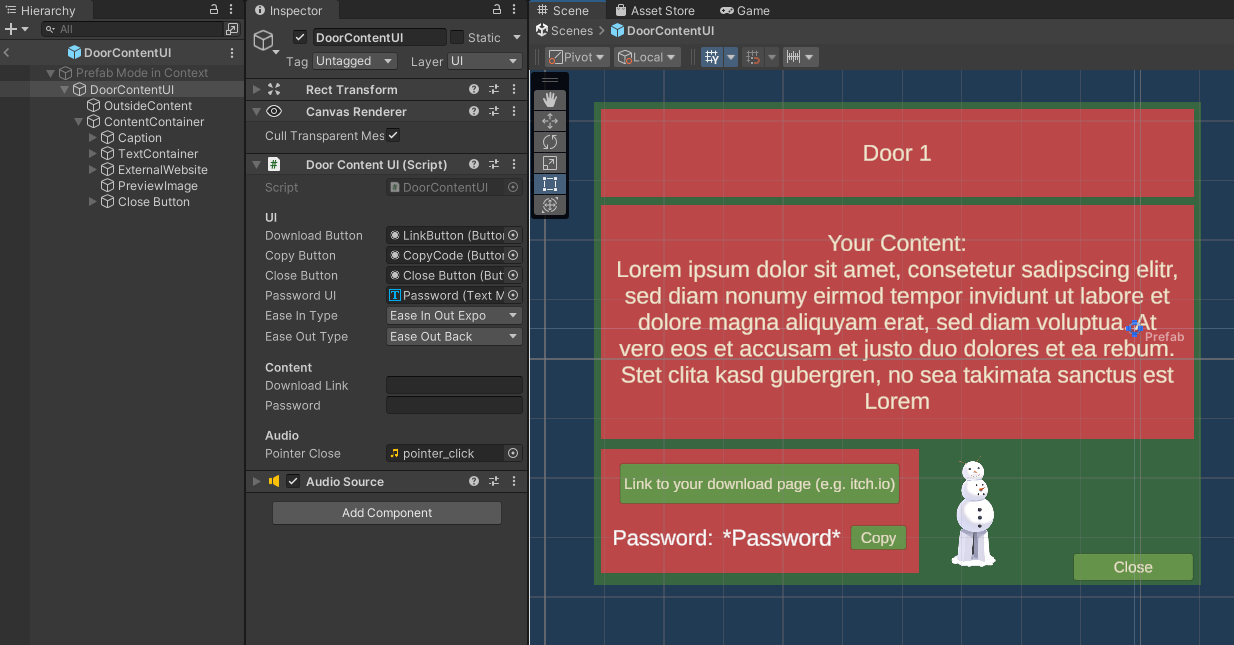
The door content is a prefab and an example of how you could present your content. I suggest you create some prefab variants of it or just change the content for each door in the scene view. The DoorContentUI script has two optional input fields: ‘Download link’ and ‘Password’, as you can see in the inspector in the screenshot below. You can use these to redirect users to another page. There are also two drop-down menus in the inspector: ‘Ease In Type’ and ‘Ease Out Type’. These are the animation types from the LeanTween library that the game object uses when it opens and closes. Clicking outside the content interface closes it.
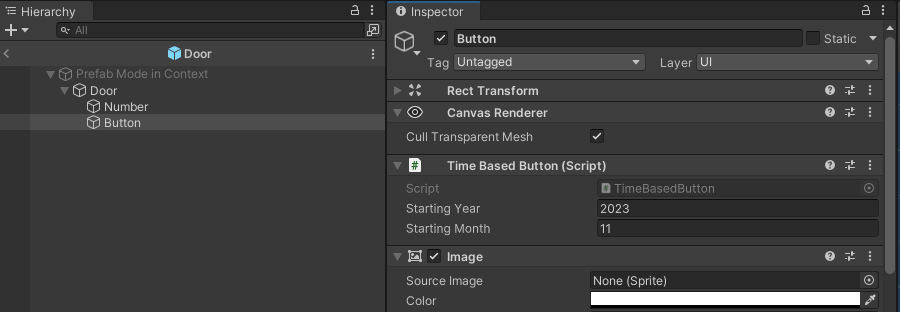
A very important configuration is on the door prefab! The TimeBasedButton script uses the current date to check if a door can be opened. In other words, if the button should be clickable. This script is attached to each button that is a child of the Door object (screenshot below). Here you can set the year and month you want to start the calendar. If you want to experiment with the mechanism, you can set the starting month to the current month in the door prefab. For your production build, don’t forget to change the starting year to 2023 and the starting month to 12.
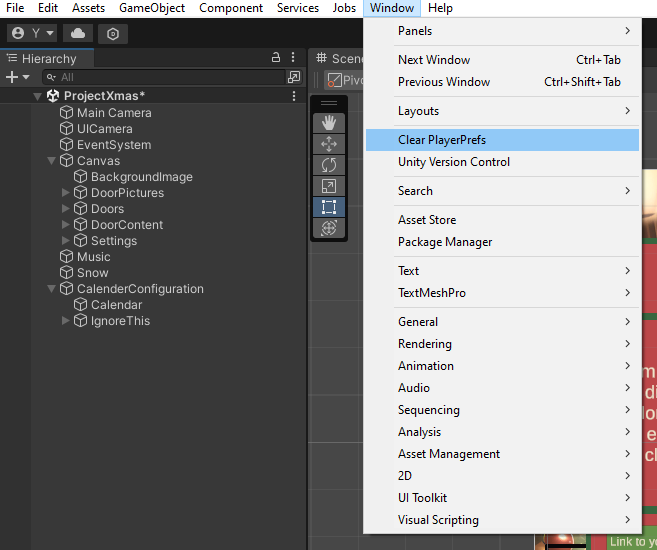
The information about a door is already opened is saved in the PlayerPrefs . So if you are testing around and open some doors during play mode the state will be persisted. I created a script, so you can reset this in your editor. Therfore go to ‘Window/Clear PlayerPrefs’, as shown in the picture below. After that, you can open the doors again in game mode.
I will create an advent calendar with my own content and host it on my itch.io page . I am still looking for some assets to put behind the doors. So if you are an artist or any other kind of creator, I would love to work together! I hope you enjoy the template and the upcoming GameAndCode advent calendar.
And now you!
- Get the template
- Bring it to live with your content
- Host it on your website or itch.io and share it with the community
- Ask me your questions :)